×

The Ultimate checklist for migrating to a new SIS

Discover the keys to a seamless Student Information System (SIS) migration using our concise infographic checklist. Whether upgrading or changing providers, this essential resource streamlines the process for a successful transition.

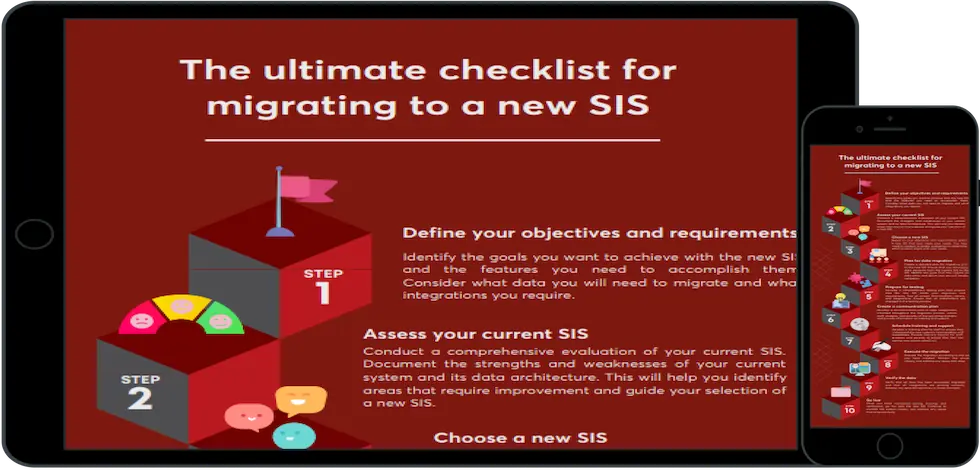
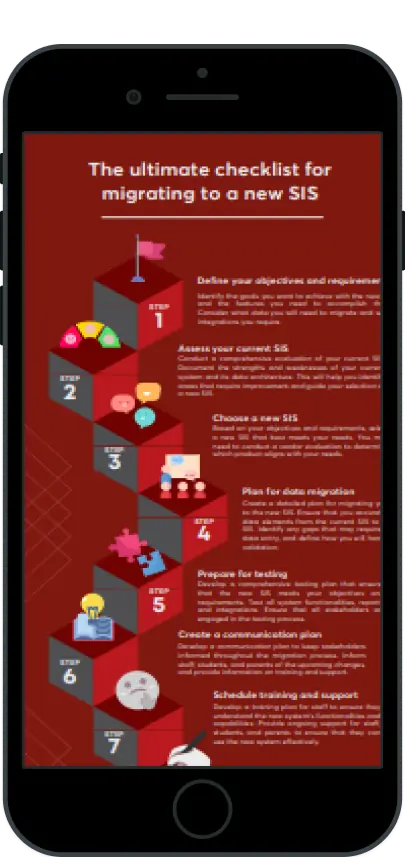
Unlock the secrets to a successful migration to a new Student Information System (SIS) with our comprehensive infographic checklist. Whether you’re upgrading from an outdated system or switching providers, this essential resource will guide you through each crucial step, ensuring a smooth and efficient transition.  

FAQ’s

Why do institutions to migrate to a new SIS?

Reasons may include outdated technology, lack of necessary features, scalability issues, compliance requirements, integration challenges, and dissatisfaction with current vendor support.

How can I ensure a smooth transition when migrating to a new SIS?

You can ensure a smooth transition by conducting thorough research, involving key stakeholders, creating a detailed migration plan, providing adequate training for staff, and collaborating closely with the new SIS provider.

What steps are involved in the migration process to a new SIS?

The migration process typically involves assessing current needs, selecting a suitable SIS provider, data preparation and migration, system configuration, user training, testing, and post-migration support.

Submit the form now and simplify your SIS migration journey.

Get your Copy!

Latest Infographics

Learn how you can transform student retention at your college with our informative infographic. Discover ten actionable strategies, from personalized academic support to data-driven decision-making,...
footer form background spheres

Join Hundreds of Organizations
that use Classter to Boost their
Efficiency & Streamline Process

With a platform that will make the management of every aspect of your institution seamless & efficient, you’ll unlock the full potential of your institution. Our team is always ready to help you get started.

Edit Template